Studio Setup 101: The Key Components of a High-Quality Recording Space
Creating a high-quality recording studio requires more than just a microphone and a computer. Whether you’re setting up a professional studio or a home recording space, having the right components is crucial to achieving clean, professional-grade sound. From acoustic treatment to essential gear, here’s a guide to building a recording space that meets industry standards.
1. The Importance of Room Selection
Before investing in expensive equipment, choose the right space for your studio. The shape, size, and materials in your room will impact the sound. Ideally, you want a space with minimal outside noise and little to no echo or reverb.
- Avoid small, square rooms – These can create unwanted sound reflections.
- Choose a quiet location – Rooms away from noisy streets, air conditioners, or household activities are best.
- Use a dedicated space – This ensures consistency in your recordings and allows for proper sound treatment.
2. Acoustic Treatment: Controlling Sound Reflections
One of the most overlooked aspects of studio setup is acoustic treatment. Good acoustics prevent unwanted echoes and ensure a balanced sound.
- Bass Traps – These absorb low frequencies and should be placed in corners where bass tends to build up.
- Acoustic Panels – These absorb mid and high frequencies, reducing echo and improving clarity.
- Diffusers – These scatter sound waves to create a natural, balanced room tone instead of a “dead” space.
For optimal results, consulting a noise control consultant can ensure that your studio is acoustically optimized for accurate sound reproduction. A well-treated space enhances both recording and mixing quality, allowing for professional-grade results.
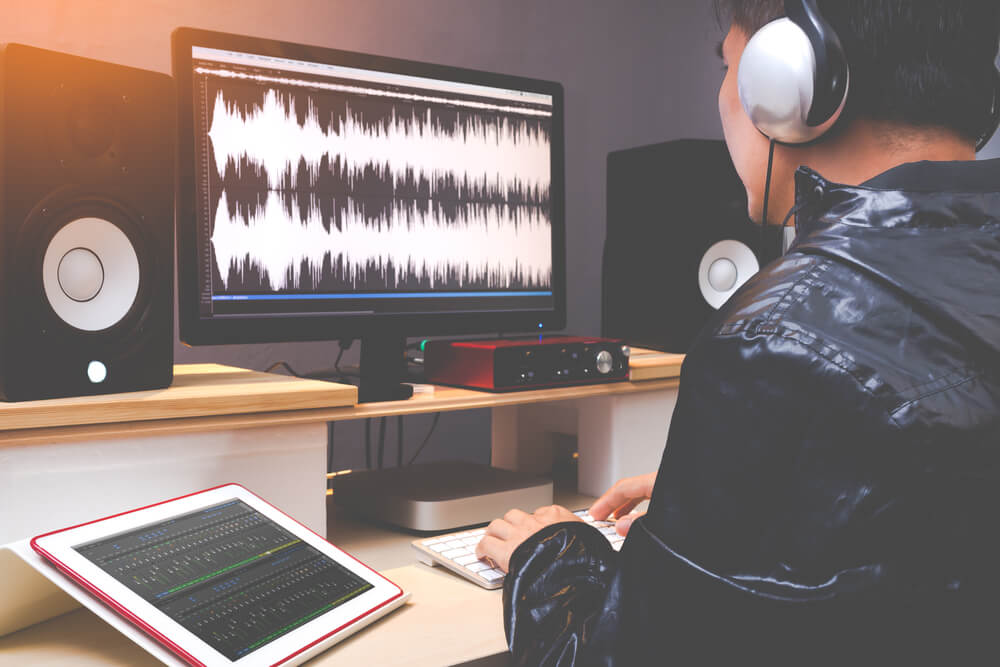
3. Essential Studio Equipment
Microphones: Capturing High-Quality Sound
Microphones are the backbone of any recording studio. Depending on your recording needs, you’ll need different types:
- Condenser Microphones – Best for vocals and acoustic instruments due to their sensitivity and detail.
- Dynamic Microphones – Durable and great for louder sources like drums, electric guitars, and live recording.
- Ribbon Microphones – Excellent for warm, vintage-style recordings, though they require careful handling.
Audio Interface: The Studio’s Brain
An audio interface converts analog sound (from microphones and instruments) into digital sound for your computer. Look for an interface with:
- High-quality preamps for clean sound capture.
- Multiple input and output options, depending on how many instruments or microphones you plan to record.
- Low-latency monitoring for real-time playback.
Studio Monitors vs. Headphones
You need accurate playback to properly mix and edit recordings.
- Studio Monitors – Unlike regular speakers, studio monitors provide a flat frequency response, giving an uncolored, accurate representation of sound.
- Studio Headphones – Used for detailed listening, editing, and monitoring during recording sessions. Look for open-back headphones for mixing and closed-back headphones for recording to prevent sound leakage.
Digital Audio Workstation (DAW)
Your DAW is the software where you record, edit, and mix your music. Popular DAWs include:
- Pro Tools – Industry standard for professional studios.
- Ableton Live – Ideal for electronic music production.
- Logic Pro X – A favorite among Mac users.
- FL Studio – Great for beat-making and hip-hop production.
Choose one based on your workflow and needs.
4. Cables and Connectivity
High-quality cables ensure clean signal transmission. Common cables include:
- XLR Cables – Used for microphones and balanced audio signals.
- TRS and TS Cables – Connect instruments and studio monitors.
- MIDI Cables – For controlling digital instruments and software.
Investing in quality cables helps avoid interference and signal degradation.
5. Power Conditioning and Backup
To prevent power surges from damaging your equipment, use:
- Power conditioners – Regulate voltage and reduce electrical noise.
- Uninterruptible Power Supply (UPS) – Protects your work in case of sudden power outages.
6. Furniture and Ergonomics
A comfortable workspace improves productivity. Consider:
- Sturdy desk – Large enough to hold your equipment.
- Adjustable chair – Provides back support for long sessions.
- Monitor stands – Position speakers at ear level for accurate sound.
7. Backup and Storage Solutions
Losing your recordings due to a computer crash is devastating. Prevent this by:
- Using external hard drives for backup.
- Storing files on cloud-based services for extra security.
- Implementing an automatic backup system to save your work regularly.
8. Optional Add-Ons for Enhanced Workflow
Once you’ve covered the basics, consider adding:
- MIDI Controllers – Useful for producing beats and composing with virtual instruments.
- Preamp and Outboard Gear – Adds warmth and character to recordings.
- Control Surface – Enhances mixing speed and precision.
In Conclusion
Setting up a high-quality recording studio takes careful planning and investment in the right components. By focusing on room acoustics, essential equipment, proper connectivity, and storage solutions, you’ll create a professional studio that delivers exceptional sound quality. Whether you’re an aspiring musician or an experienced producer, a well-equipped studio will help bring your creative vision to life.